Restoring the stock and forewood of a Winchester 1886 rifle.
The very first thing to do is clean the wood by removing the old varnish, stains, wax and dirt.
The best method is to buy a good varnish remover in a do-it-yourself shop; many good removers are available, that remove all varnishes, paints and other dirt without affecting metal parts and glue.
After a first cleaning operation with terpentine or white spirit, the entire woodwork should receive a good layer of remover. After about 15 min (depending on the instructions on the removers can), a first layer of destroyed varnish can be removed using a scraper. After that, the wood should be generously rinced with warm water (be sure to wear rubber gloves). If necessary, the operation can be repeated to remove remaining traces of varnish.
Now that the wood is clean, it should be carefully investigated to trace all small damages that are to be repaired. There are of course many different restoration techniques, but they are all related to the causes of the faults, their shape and their
dimensions.
Here a summary of some techniques:
1. Water injection: the most difficult, yet the best of all techniques.
2. Application of a layer white woodglue and light polish after drying
3. Application of a filler composed of wood dust mixed with wood glue to fill the gaps
4.Grinding off (as less as possible)
5. Enting with pieces of wood similar to the originals.
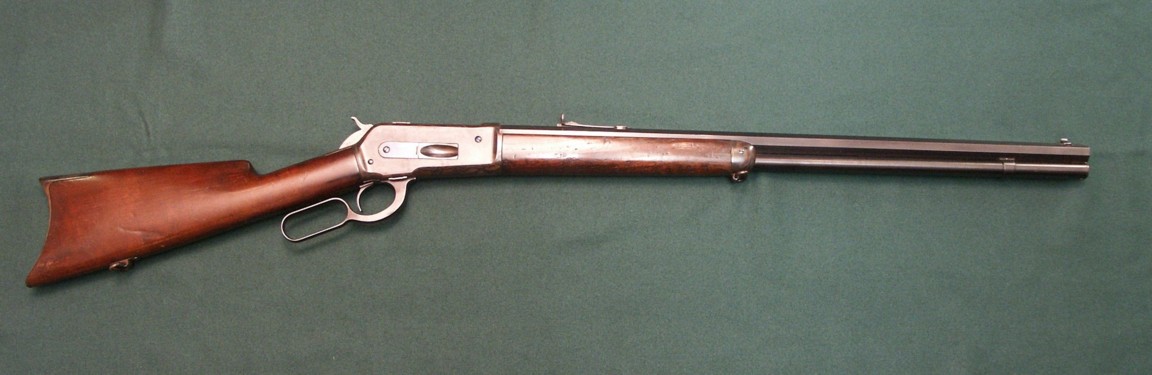
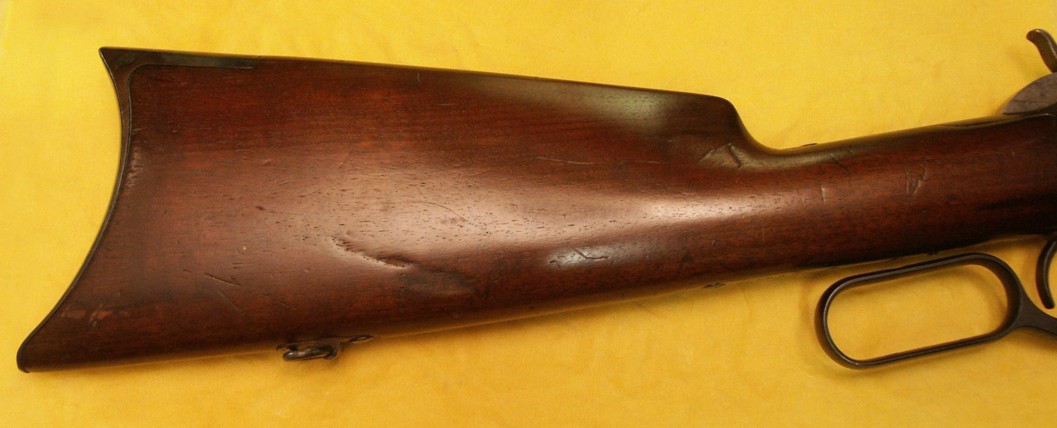
The wood parts shown on the attached pictures present a large number of various digs and dents. There is also a very large and very deep one, which is fortunately
not sharp, numerous sharp digs, scratches and missing chips.
The most apparent fault is of course the large, unsharp deep one.
Picture 1 : before restoration.
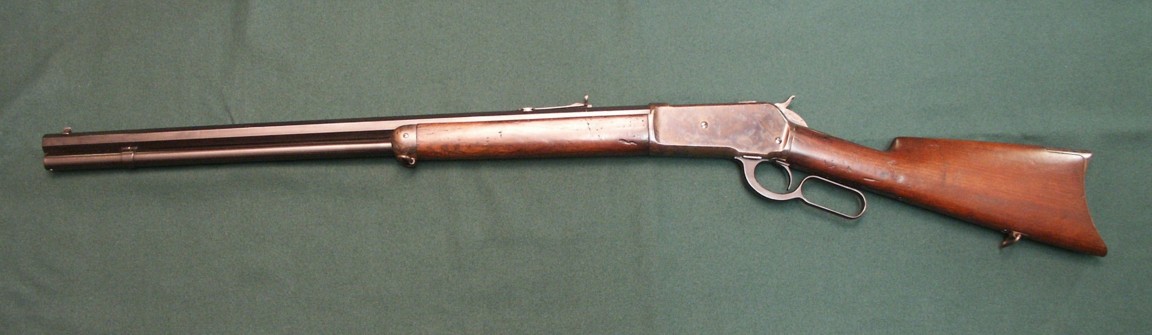
Picture 2: After restoration.
What does that mean ?
It means that the wood fibers in the deep depression are not broken but only pushed in, which was probably caused by an object without sharp edges.
And that is our luck, because we can now use technique n° 1 (water injection).
The first tool we need is a very sharp blade, for instance a razor blade or a scalpel.
With that blade, we are going to cut deep incisions into the whole surface of the damaged part, following the natural fibers of the wood.
After that, using a toothpick, we introduce very small drips of water in every cut we made.
Why "very small drips" ? The reason is simple: the water will cause the wood fibers to swell up again, and we must avoid swelling of the undamaged areas.
If water enters undamaged areas, it must be dried out immediately, otherwise the whole work will be lost.
Picture 1 shows the result after not less than 42 injections and about 10 re-cuts in the wood. That is why I wrote that this technique is the best one but also the
most difficult one. I should also have written that it is the slowest one as well. The method requires high precision and lots of patience.
The other faults are mainly small sharp digs. I can try the water injection method, but I know that the results could be deceiving. I will also add some oxalic acid to the water because it whitens the wood
and removes the black dirty traces on the edges of the faults. After that, I apply techniques 2 and 3 depending on the depth of the digs.
Scratches and light faults are removed using method n° 2 only.
Using a toothpicker, I introduce a few quantity of white wood glue into the fault; then i grind lightely off the surrounding wood with a piece of fine sand paper (min 200), pushing the dust into
the glue. When the glue layer is entirely covered by dust, i grind it lightely off, without blowing away the dust.
After abt 15 minutes, the excedent of dust can be removed and resume the entire operation as many times as necessary. The small digs require generally not more that 2 or 3 operations.
Deeper faults are repaired following method 3.
I made a homogen pasta mixing wood dust with glue, and filled the gaps with the pasta. Since the pasta volume will decrease while drying, it is important to use more than necessary to fill the gap.
The next day, the repair can be egalized by grinding off the excedent with fine sand paper.
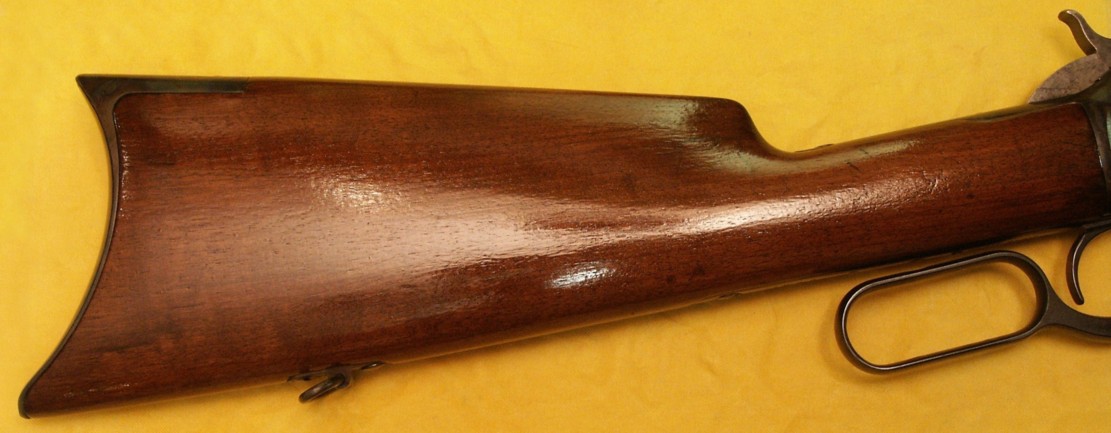
The operation is finished by browning the wood again, repolish with a 1000 grain polishing sponge, and applying 3 layers of matine varnish.
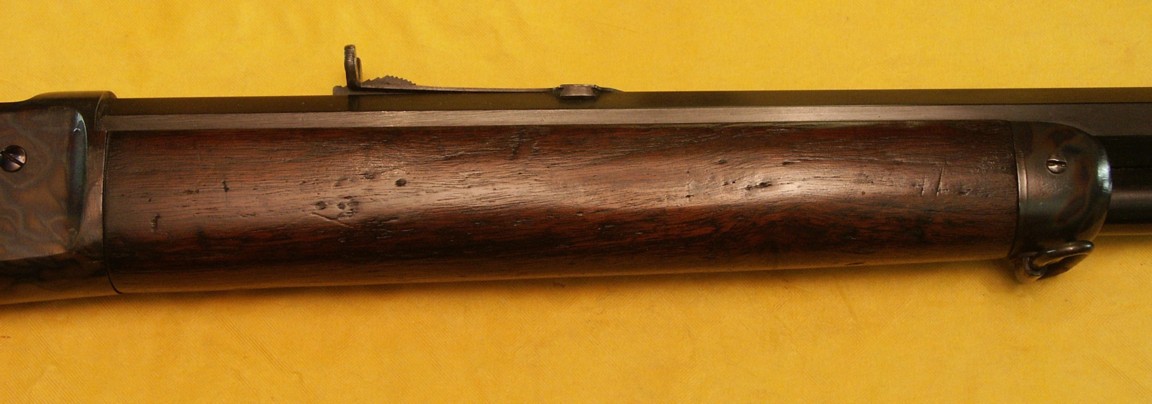
Before restoration
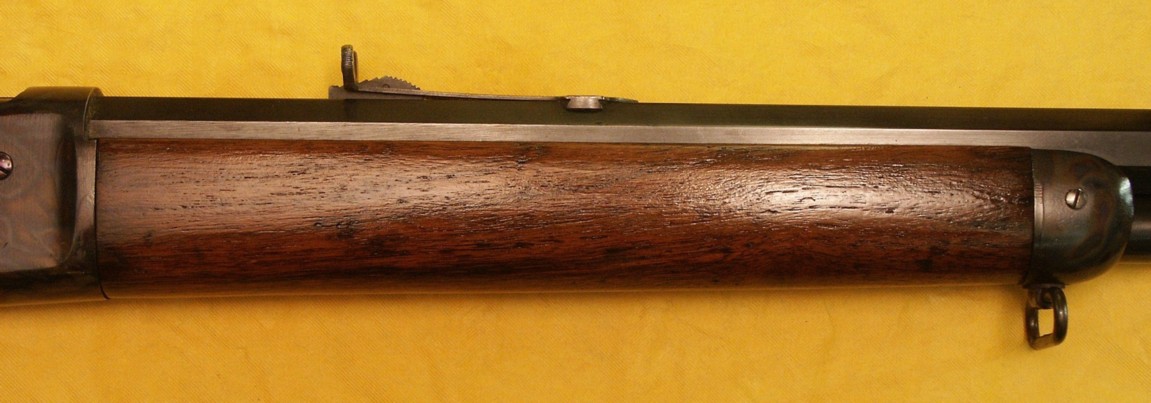
After restoration.
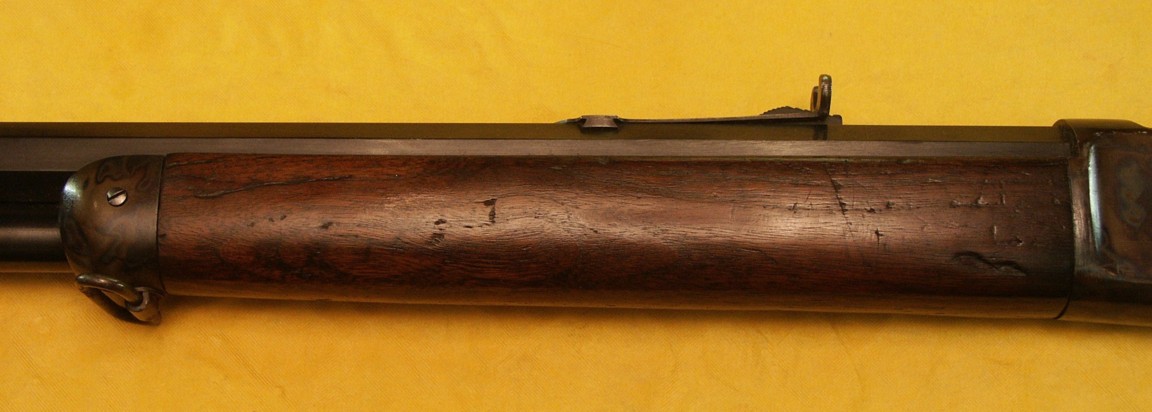
Before restoration
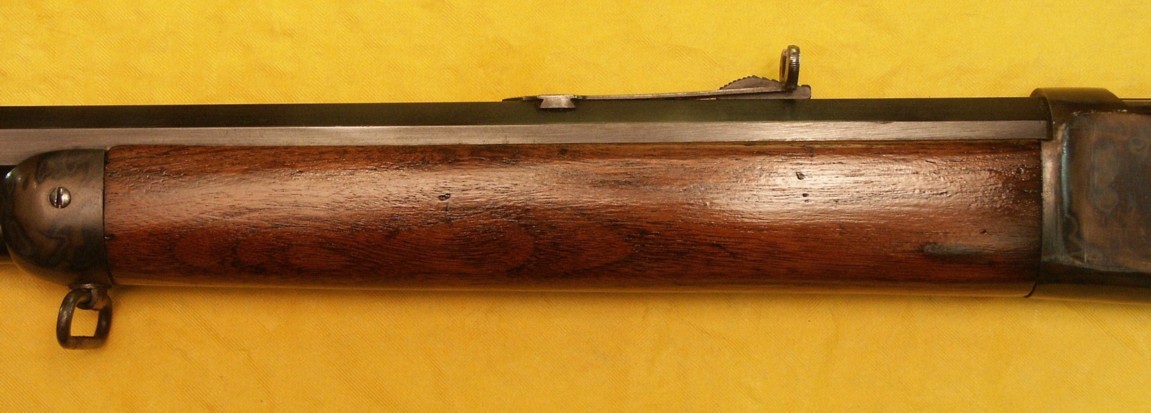
After restoration.

Before restoration

After restoration.
I hope that these some explanations will help you to restore the wood of your weapon.
I am cabinetmaker of trade, if you require for council or if you wish to entrust a work of this kind to me, do not hesitate to contact me: